Get clean pictures!
La version Francaise bientot!
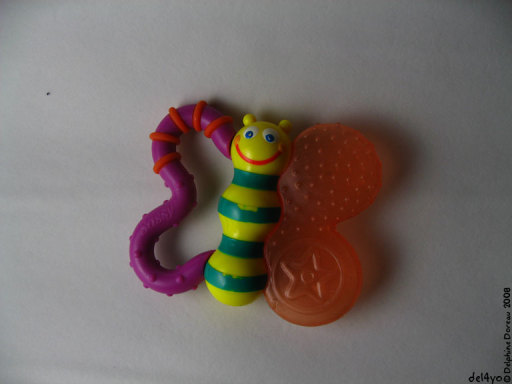
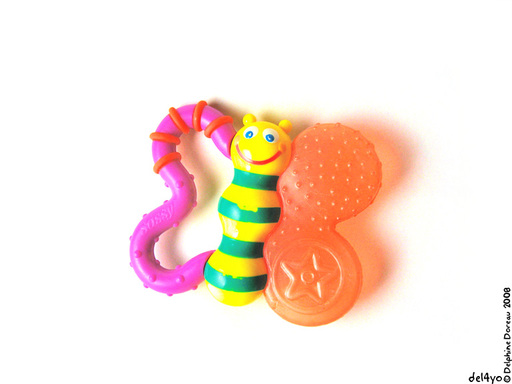
Getting clean pictures is not easy. I took that picture of my baby's favourite rattle , but it came out gray and shadowy. I wanted it sharp on a white back ground. Let's see what we can do about it.
This tutorial is for advanced Photoshop users.
Please read the Photoshop help before asking technical questions :)
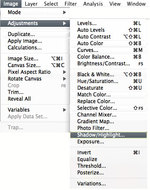 First let's learn about using the shadow/hilight tool. I love it, just plain magic.
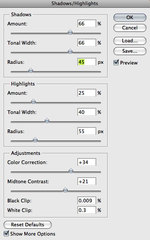
Open it and click on the tiny box " Show more options". Moving the shadow options will make the shadows lighter, and the highlight options are to make the Highlights darker. Color correction is for overall saturation. I find it a bit touchy. I click preview on and off quite often with this tool, to check where I'm going, because it's easy to go toooooo far!
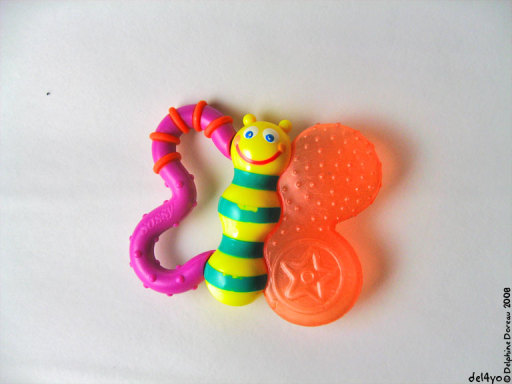
Here's what I get : so much better, in a snap!
Now I will duplicate my layer and extract the background to add some zing to it. I will add a layer mask. No big deal. First select the background using the selections tools of your choice. I'm perfectly happy with the magic wand:
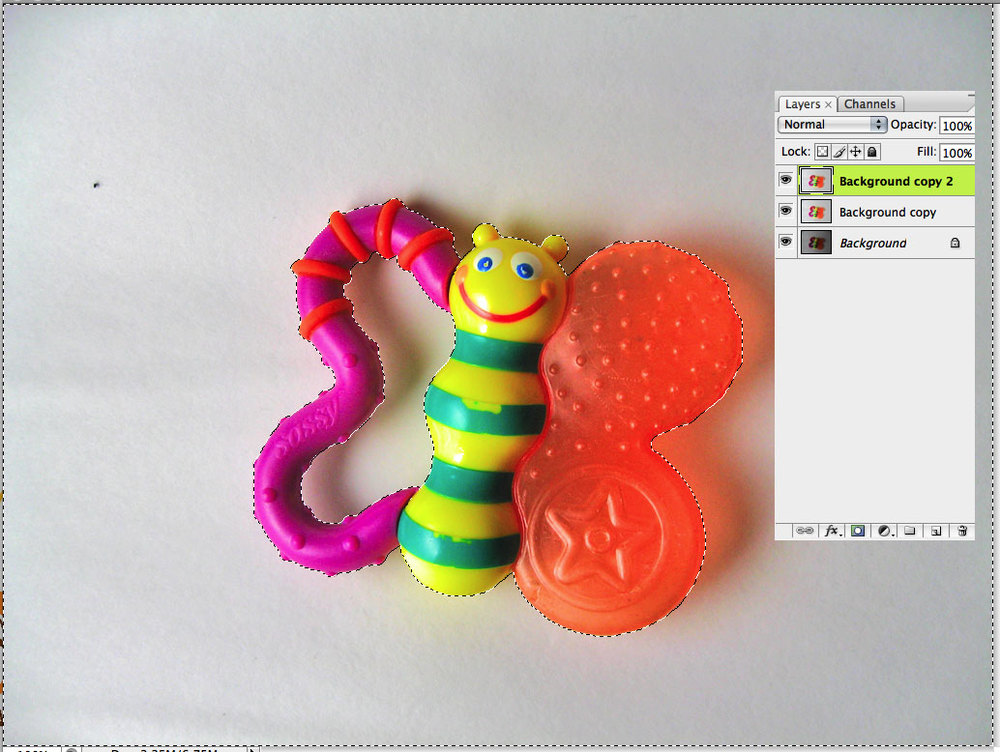
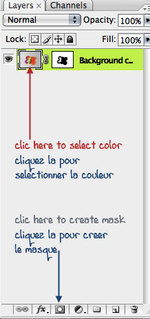
Now we want to work on the background only, so let's add a mask to that layer. Click on the layer mask Icon on the lower part of the Layers window. Done ( that was easy).
Your layer has now 2 icons, one for the color, one for the mask. Click on the color to select it.
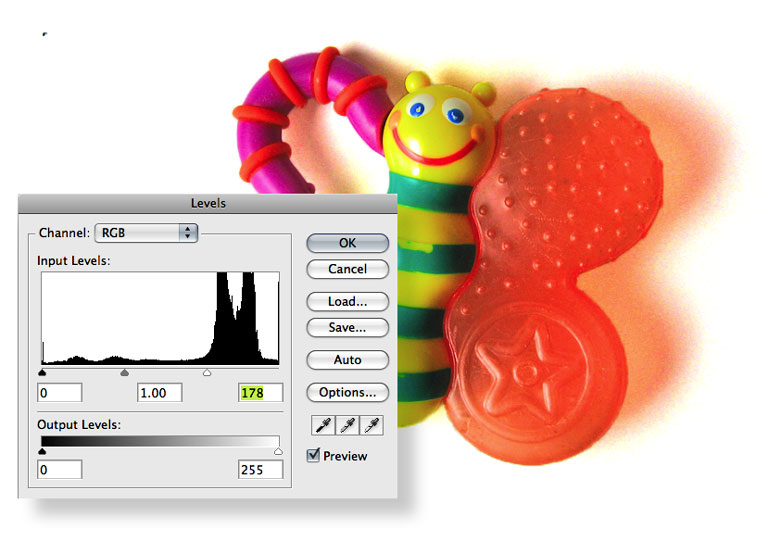 Now let's change that background using the level tools (images, gnaga, levels) . The window that pops up has a diagram, showing the amount of levels of black on right, white on left, and all levels of grey in between. I want all my lightest colors to be pure white, so I will move the right arrow left until the background is white except for the shadows. Bingo! I add a bit of white paint brush to erase some unwanted dust, here we go.
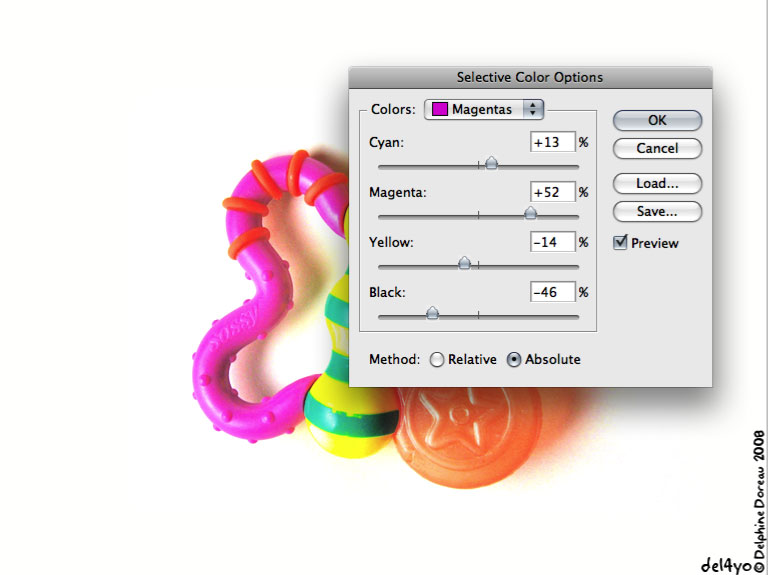
Now back to the underneath layer. I find it a bit dull now with those bright shadows, and I pump it up a little bit with the Selective color tool. I also now that when published it will be darker and duller. So what I do is play this tool , keeping in mind the complimentary color rules. In yellow I remove a bit of Cyan and Magenta, in reds I remove cyan, etc. Pretty!
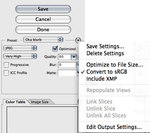
Finished! It looks a bit bright on screen but perfect for printing. Now let's save it "for web", using these options:
If you are on Windows (baah) you probably are already saving jpegs in SRGB. But not on a Mac. Using the "convert into SRGB" option will save you a lot of time and surprises. Very few printers actually know about color settings,using the basics will keep your picture safe.
Enjoy your homemade book or print!